Showing posts with label book binding. Show all posts

Thursday, August 28, 2014

Now We're Almost There

Alright, it is August 28th, and the project has almost reached it's exciting finish. I can now safely say that I have created 25 copies of my book. It was a big crunch to get everything done before heading to Calgary for the last week of August, and I didn't quite make it; there is still some final gluing that needs to be done in the next couple of days. That said, the text blocks for each book have been folded into single signatures, bound and editioned, and the covers are folded and ready to be glued.


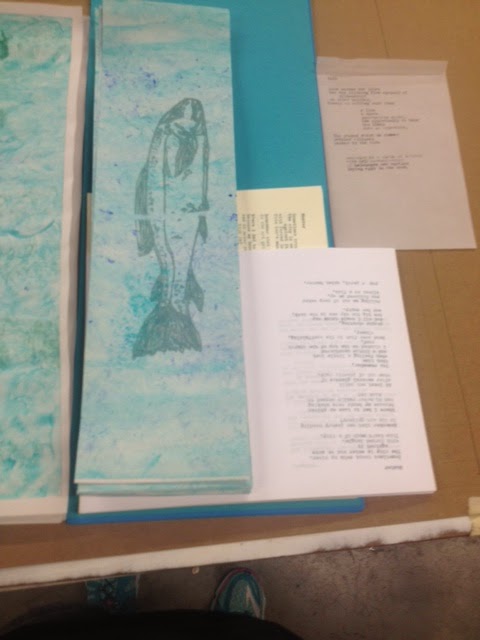
Using screen printing has been a really interesting way of making this project happen. Initially I was going to do the whole book in "duo-tone", meaning I would be using two layers of ink. After, doing some tests of the second layer of ink I decided to keep this only for the images because properly registering all of the pages of text would take more time and paper than I have. Mostly paper. Have I mentioned this before? I know I have. Starting any printing project means using way more paper than you would expect. Doing the whole book in duo-tone would mean making twice as many first layer prints or more with the expectation that on the second layer, I would probably waste half of my attempted prints. Anyway, here is a quick pick of how one of the images turned out.


After getting everything folded, I bound the signatures using a 3 hole bookbinding stitch, using bookbinders thread. Super simple but it did the trick.


The outer sheet of the signature will become the inner part of the cover once the books are all glued together. Here, I used some beautiful mulberry paper for two reasons: 1) it is super pretty (obviously!) and 2) Mulberry paper is really strong and archival quality. This is because the mulberry fibers that are used to make the paper are very long. Because this paper comes in the wrong size for what I was doing I had to trim the paper. I did this using water and tearing it rather than cutting it to size because I wanted to keep the nice edging on the paper. 

I also glued the covers together, so now they are are all ready to be put together with the text block. To do this, I used some small Litho stones that we have in the print shop for weight. 


Tomorrow, I will be heading back to Kelowna and back to finish with the final gluing of everything. Onwards!


Wednesday, August 13, 2014

10 Things I Have Learned: a bookmaking list

The internet has inspired me to make a list.... with pictures! 

(and I stole them all...)


1. As with life, anything that can can go wrong, probably will.


2. You will run out of the paper that you want the most.


3. You will be unable to find satisfactory paper and will have to either order online, or get crafty.


4. You will feel like you are using an entire forest worth of paper.


5. There are a million ways to bind a book, pick one.


6. The simplest binding is the best binding for short books in large quantities.


7. Have a REALLY good mock-up of your text block. Without this, likely you are either a computer or your pages are everywhere.


8. Measuring and cutting will take twice as long as you think.


9. Always work on a clean surface, because once there is stuff on your paper, that't it for that paper.


10. If you are using letter press, make sure there is enough type for what you need it for, because you will run out of that too. 


Wednesday, August 6, 2014

Book Binding At Long Last!

At last! I have reached the Promised Land! Today is most definitely the first day that I have really felt like I am making books. Now that I have gotten together many of the materials that I need, and I know which direction (sort of) that I am going in, I can start actually making books.

Today, I assembled two different books, filled with blank paper to practice before I settle on a design and work away at the text blocks to fill them. As I mentioned in my last post, I will unfortunately have to give up the ghost of lead type for my text block. Instead, I will be doing the entire book using screen printing. The initial image of the text will be designed and typed on a typewriter and then transferred to screen... but that whole hurrah will be discussed in a different blog post!

The first book is a folded "soft-cover". The cover is made with a light card, called Casan Mi-Teinte turquoise, that I folded and attached the would be text block (in this case blank pages) to. I cut and pasted one of the screen print fish that I designed for the cover onto the card before folding.


The important thing with this type of cover design is that you want the length of the paper that will become your cover to be twice the length of the final cover size so that you can for it in on itself. I wanted my cover to be 12" X 9" so the paper that I am using in this pic is 24" X 9". Make the first fold directly in the middle of the paper. Next, measure and mark 6" from the center fold on either side. Fold where these marks are "hamburger"-wise as the kids say, or in layman's terms parallel to the first fold. This is your cover.


 Next, you get the "text block" ready. I did this binding the text pages together, or the guts of the book shall we say, using a simple 3 hole pamphlet stitch. You can find super easy instructions for that here (this is the site I used!).


Finally, take your guts and glue them to the two inner flaps using pH neutral binding glue. (The glue is important because other things will degrade over time eating away at the paper and all your hard work). The inner sheet that I used was a scrap of mulberry paper.

After all that's together, you may also want to press the book under something heavy. Unless you happen to have a bookbinding press lying around, which we just happened to have at UBCO, you can really use anything heavy for this: a cinder block, Michelangelo's David, you know, whatever you happen to have kicking around that will allow it to lie flat between two flat surfaces that cover the entire thing with pressure. If it's not totally covered you might end up with some kinks in your beautiful cover and we can't have that now. 

As for the learning experience today, I will be doing some more screen printed fish in a lighted contrast with more translucent ink to see how they look compared to the stark grey and black I used on the last ones. Also, I have come to the conclusion that I will be doing two editions of the book... one soft-cover and one hard cover. Stay tuned for next time when I explain how I will be constructing the hardcover versions of my book!